 how-to
Excavation Safety Compliance: A Step-by-Step Guide
Table of Contents
- Step 1: Conduct a Hazard Assessment and Site Survey
- Step 2: Classify Soil and Select Protective Systems
- Step 3: Implement OSHA Excavation Safety Checklist Requirements
- Step 4: Assign a Competent Person and Meet Excavation Requirements
- Step 5: Obtain Permits and Locate Underground Utilities
- Step 6: Use Construction Site Safety Management Software
- Step 7: Conduct Daily Inspections and Document Compliance
- Frequently Asked Questions
Last Updated: September 18, 2026
Step 1: Conduct a Hazard Assessment and Site Survey
A hazard assessment is your foundation for excavation safety compliance. Walk the entire site and document existing structures, utilities, ground conditions, water collection areas, and soil stability. Take photos and notes. This upfront work prevents emergencies later.
Your site survey should include:
- Underground utility locations (gas, electric, water, telecommunications)
- Nearby buildings and their foundation depths
- Soil type and drainage patterns
- Weather conditions and seasonal water tables
- Access points and egress routes
- Proximity to traffic or pedestrians
Step 2: Classify Soil and Select Protective Systems
Soil classification determines which protective system you need. Different soils behave differently under stress, clay holds together longer than sand, rock is stable but hard to dig. You cannot use the same approach for all soil types.
A competent person with training in soil mechanics must classify the soil on site by examining samples, testing stability, and documenting the classification. This is a critical safety requirement, not guesswork.
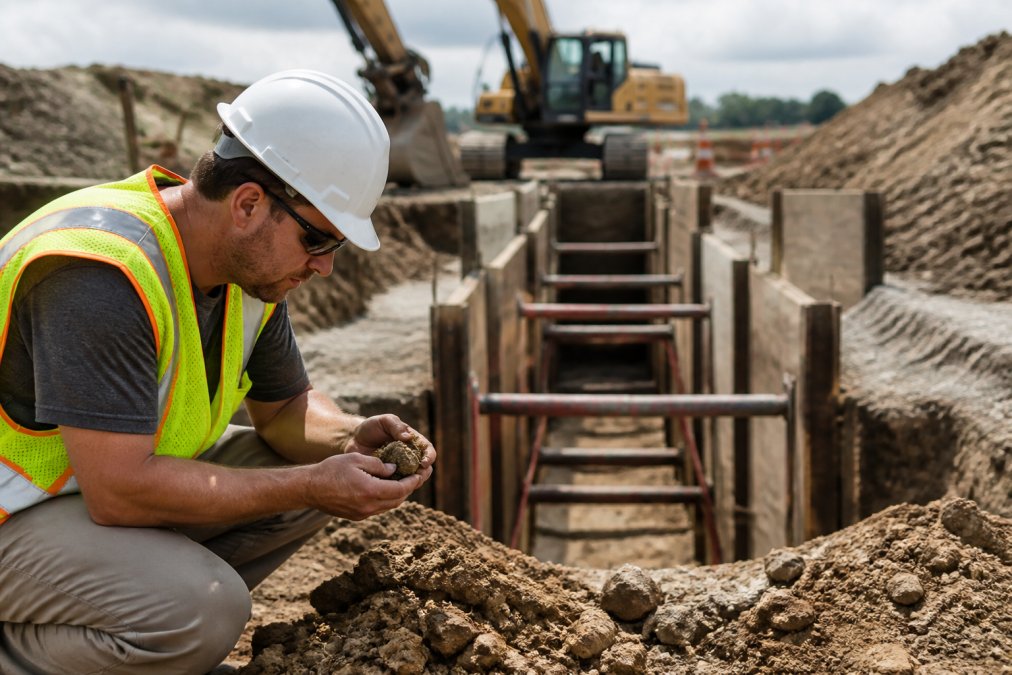
Once you know your soil type, select your protective system:
- Sloping: Cutting the trench wall at an angle so soil doesn't collapse. Works well for stable soil but requires more space.
- Shoring: Installing supports like beams and hydraulic jacks to hold soil walls in place. Used for deeper trenches in unstable soil.
- Shielding: Using a trench box or shield to protect workers if collapse occurs. Best for confined spaces or very deep work.
Each system has trade-offs. Sloping is cheapest but needs room. Shoring is flexible but takes setup time. Shielding is safest but most expensive. Choose based on soil type, depth, and site conditions.
Step 3: Implement OSHA Excavation Safety Checklist Requirements
OSHA regulations govern excavation work across the country. Following them is not optional, it's the law.
Your excavation safety checklist must cover:
- Daily inspection before work starts
- Competent person assignment and duties
- Protective system installation and inspection
- Safe means of egress (ladders, ramps, or steps every 25 feet)
- Utility locating and marking
- Atmospheric testing if needed
- Weather monitoring and response plans
- Crew training and documentation
Keep this checklist on site and review it each morning with your crew. If something is incomplete or unsafe, do not start work. Digital tools work better than paper: a mobile app lets your crew submit photos and sign off on tasks from the field. SolvPro's field service management platform includes customizable checklists that sync across your team.
Step 4: Assign a Competent Person and Meet Excavation Requirements
A competent person is the cornerstone of excavation safety compliance. This is a legal responsibility requiring training, experience, and authority to stop unsafe work.
Your competent person must:
- Inspect the excavation daily before work begins
- Inspect protective systems and equipment
- Identify hazards and unsafe conditions
- Have the authority to halt work if safety is at risk
- Document all inspections in writing
- Understand soil classification and protective systems
- Know OSHA regulations and company safety procedures
Assign someone dedicated to excavation oversight, the crew leader for small crews, or a dedicated safety professional for larger operations. Document their training and keep records of certifications and courses for inspector verification.
Step 5: Obtain Permits and Locate Underground Utilities
Before excavation begins, obtain permits and locate utilities, both are legal requirements. Skipping either exposes your company to fines, criminal liability, and catastrophic injury.
Permit Requirements
Excavation permits vary by jurisdiction but typically require submission of:
- Site plan showing excavation location, depth, and dimensions
- Soil classification and selected protective system (sloping, shoring, or shielding)
- Name and qualifications of the designated competent person
- Emergency contact information and rescue plan
- Utility locating confirmation (see below)
Submit permit applications at least 5-7 business days before work begins. Do not excavate without an approved permit; violations result in stop-work orders and fines up to $15,000 per violation.
The 811 Utility Locating Process
Call 811 at least two business days before excavation begins. Provide the site address, scope of work, callback number, and best access time. Within 2-3 business days, utility locators will mark underground lines using standard colors: red (electric), yellow (gas), blue (water), green (sewers), orange (telecommunications), and pink (survey markings).
Your competent person must be present during locating. Verify all known utilities are marked and take photos from multiple angles for compliance documentation.
Hand-Digging Verification
After utilities are marked, hand-dig the first 2-3 feet in all marked utility areas before bringing in heavy equipment (required by OSHA 29 CFR 1926.502(b)(2)). Use shovels, picks, or air spades. If you encounter a line, stop and contact the utility company. Document hand-digging with photos showing the marked location, hand-dug area, and confirmation that no lines were struck. Store these photos in your compliance file.
Liability and Consequences
Hitting a utility line carries severe consequences: gas strikes risk explosion and fatalities with fines of $100,000+; electric strikes risk electrocution; water main strikes cause flooding and $10,000-$50,000+ in repairs; telecommunications strikes cause service outages. Your company is liable for all damages and injuries. Even if a utility marked a line incorrectly, you are responsible for hand-digging verification.
Documentation
Maintain a file for each project containing the approved permit, 811 confirmation, photos of marked utilities, hand-digging verification photos, and competent person sign-off. Keep records for at least three years.
Step 6: Use Construction Site Safety Management Software
Digital compliance documentation is critical for excavation safety management. Paper-based systems create three problems: records are lost or incomplete, compliance audits take weeks, and incident investigations lack timestamped evidence.
The Paper-Based Compliance Problem
Paper-based systems fail: records are lost when crew members leave or checklists get wet; documentation is incomplete when inspections aren't recorded daily; compliance audits take 20 hours to gather scattered documents instead of 10 minutes with a digital system.
How Digital Compliance Documentation Works
Construction site safety management software centralizes excavation documentation in one searchable database. Your competent person opens the mobile app, completes a customizable checklist covering protective system integrity, trench wall condition, ladder placement, weather changes, equipment maintenance, crew PPE, and atmospheric testing. The app automatically timestamps the inspection, records the competent person's name, syncs to the cloud, and creates tasks for identified hazards. Integrating these digital safety logs with broader site management protocols ensures that construction site sanitation remains as consistent and verifiable as the structural integrity of the trench itself.
Corrective Action Tracking:
If the inspection reveals a damaged ladder, the system logs it as a hazard. A task is created: "Replace ladder at Trench A." The assigned crew member receives a notification, completes the work, and photographs the replacement. The system records when the task was created, assigned, and closed. This creates an audit trail proving the hazard was identified and corrected.
Permit and Utility Documentation:
Store your approved permit, 811 locating confirmation, and utility marking photos in the project file. When a regulator asks for proof that utilities were located, you pull up the project, show the 811 confirmation date, and display timestamped photos of marked lines. This takes 30 seconds instead of 30 minutes.
Soil Classification and Protective System Records:
Your competent person documents soil classification with photos of soil samples, test results, and the selected protective system.
Incident Investigation:
- Daily inspections for the week leading up to the incident
- Hazards identified and corrective actions taken
- Weather conditions and environmental changes
- Crew training records
- Equipment maintenance logs
Key Features of Effective Digital Systems
- Customizable templates: Adapt checklists to your specific excavation types (trenching, foundation work, utility installation)
- Mobile-first design: Crew members work from the field without needing to return to the office to document
- Automatic timestamping: Every entry is timestamped and cannot be backdated, creating defensible records
- Photo and video upload: Attach evidence directly to inspections and hazard reports
- Real-time alerts: Supervisors are notified immediately if an inspection is incomplete or a hazard is identified
- Compliance reporting: Generate reports for regulators, insurance audits, or pre-bid requirements in minutes
- Integration with scheduling: Link inspections to work orders and crew assignments so nothing falls through the cracks
- Offline capability: Crew members can document work without cell service; records sync when connectivity returns
Implementation Best Practices
Train your competent person first. They will use the system daily. Ensure they understand how to navigate the app, upload photos, and create tasks. Provide 1-2 hours of training before the first project.
Step 7: Conduct Daily Inspections and Document Compliance
Daily inspections are mandatory. They happen before work each day and whenever conditions change. Your competent person leads the inspection and documents findings.
Check these items each day:
- Protective system integrity (no damage, proper installation)
- Trench walls for cracks or loose soil
- Ladder or ramp placement and condition
- Weather changes that affect safety
- Equipment function and maintenance needs
- Crew alertness and proper PPE use
- Changes in water table or drainage
Frequently Asked Questions
What is the 5-4-3-2-1 excavation rule?
The 5-4-3-2-1 rule is a memory aid for safe excavation practices: 5 feet of clearance from utility lines, 4 feet maximum depth before protective systems are required, 3 feet minimum width for safe entry, 2 spotters for every excavation, and 1 competent person on site. This framework helps teams remember critical safety checkpoints during excavation work.
Who is considered a competent person for excavation work?
A competent person for excavation is someone trained to identify hazards, authorized to take corrective action, and capable of conducting daily inspections. OSHA requires competent persons to understand soil mechanics, protective systems, and hazard recognition. They must be present during all excavation operations and have the authority to stop unsafe work immediately.
When is a trench box required by OSHA?
OSHA requires trench boxes (shielding) in trenches deeper than 5 feet where soil conditions or other factors make sloping or shoring impractical. Trench boxes protect workers from cave-in hazards and must be properly installed, inspected daily, and sized to fit the trench dimensions. The choice between sloping, shoring, and shielding depends on soil classification and excavation depth.
How does digital safety management software improve excavation compliance?
Construction site safety management software centralizes permits, daily inspection checklists, competent person assignments, and compliance documentation in one platform. This reduces manual paperwork, ensures inspections happen on schedule, tracks corrective actions, and creates an audit trail for regulatory compliance. Real-time alerts help teams address hazards before they become incidents.